Thursday, December 9, 2010

Indigo Dyeing, Finishing Up

The yarn I dyed Tuesday is not quite dry, but I thought you might like to see a few things that are finished.
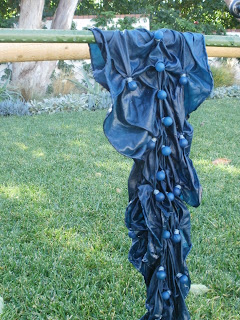
Silk Camisole


The lower edge was tied with sewing thread over black beans.  The upper area was pleated and clipped with clothespins. 

 Woven shibori scarf.  Cotton warp, rayon chenille weft.  


Arashi (pole-wrapped) Shibori, silk crepe de chine scarf.


Silk charmeuse scarf, dyed first, pleated and folded, then clamped between two canning jar lid inserts. 


The indigo dyeing process involved a full day of prep work and another day to complete the dyeing, rinsing, and removal of resist threads, etc.  Lots of work, but well worth the effort! 

Tuesday, December 7, 2010

Indigo Dyeing

I spent most of today with my good friend, Susan, and her sister, Kathy, who is visiting from Japan.  We dyed a variety of things using an indigo dye kit.  It was a perfect day to be outside in Susan's beautiful back yard.  I took several pictures of things as they came out of the dye pot; here is a silk scarf with marbles tied in:

This is an experiment in Arashi shibori, also known as pole-wrapped shibori.  The fabric (in this case, a silk scarf) is wrapped around a length of pvc pipe, secured with cotton yarn, and then immersed in the dye bath.
 
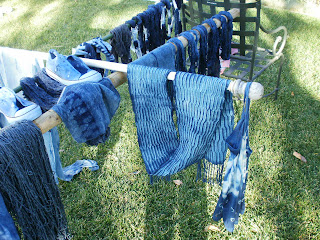
Susan set up a system of drying racks, here draped with skeins of yarn, silk scarves, Susan's tennies, etc.

Below is a close-up of Susan's Indigo Converse All-stars! 


The scarf on the left was folded, clamped, and overdyed.  The one on the right is the final result of pole-wrapping.
  
More scarves, various resist techniques:


 Some of our results after removing wrappings, bindings, clips, etc:

What a great day!  Fun to be with friends and experience something new!  Plus, we took a break and had a delicious lunch at Zena's in Orange, an excellent Lebanese restaurant.  

After coming home I rinsed my scarves and yarn and hung them to dry.  Can't wait until tomorrow to see the final results!  


Friday, December 3, 2010

Sari Silk Vest, Part 4

Finally!  I finished stitching the shisha mirrors and fabric squares to my vest, placing them at random on the fronts and the back.

The next step is to cut the lining and make the binding.  For the lining, I may incorporate some of the sari fabric scraps.  I like to make the inside of a garment interesting as well.  For the bias binding I found the perfect color silk; a shade of wine that is just the right accent. 

Following directions in the book, Happy Endings - Finishing the Edges of Your Quilt,  by Mimi Dietrich, I'm going to make continuous cut bias binding.  I've had the book for many years, and it's been a great resource; well illustrated and clearly written instructions.  Bias binding works well in many finishing situations and has a stretch that allows it to turn smoothly around curves, miter edges, and lie perfectly flat along a straight edge.  The method of continuous cut binding allows one to make one long strip of binding by sewing only two seams.  Much easier and more accurate than sewing a lot of separate strips together!